This guide provides comprehensive insights into Seymour Duncan pickups, offering detailed wiring diagrams, installation tips, and tone-enhancing modifications for guitarists seeking to optimize their sound.
Overview of Seymour Duncan Pickups
Seymour Duncan pickups are renowned for their exceptional tone and versatility, offering a wide range of models to suit various musical styles. From single-coil designs like the Vintage Rails to humbuckers such as the SH-4 JB Model, these pickups are crafted to deliver clarity, warmth, and sustain. Known for their high-quality materials and precise winding techniques, Seymour Duncan pickups are a favorite among guitarists seeking to enhance their instrument’s sound. Whether you’re playing rock, jazz, or blues, their diverse lineup ensures there’s a pickup to match your tonal preferences, making them a staple in the world of guitar electronics.
Importance of Proper Wiring for Tone
Proper wiring is crucial for achieving the desired tone from your guitar. Incorrect wiring can lead to low output, high resistance, and unwanted hum or noise, compromising the overall sound quality. Seymour Duncan wiring guides provide detailed diagrams to ensure pickups are installed correctly, maintaining optimal signal flow. By following these guidelines, guitarists can unlock their pickups’ full potential, ensuring clarity, articulation, and the precise tonal response they seek. Attention to wiring details is essential for maximizing the performance of Seymour Duncan pickups and enhancing the musical experience.
Understanding Basic Guitar Electronics
Guitar electronics form the backbone of your instrument’s tone. Key components include pickups, which capture string vibrations, pots for volume and tone control, capacitors that refine frequency response, and switches to select pickups. Wiring connects these elements, ensuring signal flows correctly. Proper understanding of these basics is vital for successful modifications and troubleshooting. Seymour Duncan wiring guides simplify this process, offering clear diagrams and explanations to help guitarists navigate their electronics confidently, whether installing new pickups or optimizing their current setup for optimal performance and sound quality.
Understanding Guitar Wiring Basics
Guitar wiring connects pickups, pots, and switches to shape tone. Pickups capture vibrations, pots control volume and tone, while capacitors filter frequencies. A 3-way or 5-way switch selects pickups, optimizing sound. Seymour Duncan guides simplify these connections, helping guitarists modify or optimize their setup for desired tones and performance.
Guitar Components: Pickups, Pots, Caps, and Switches
Guitar components include pickups, which capture string vibrations, pots for volume and tone control, capacitors to filter frequencies, and switches to select pickups. Seymour Duncan wiring emphasizes the role of these parts in achieving desired tones. Proper installation and understanding of each component’s function are crucial for optimal sound. This section explains how each part contributes to the overall wiring setup, ensuring guitarists can make informed modifications and achieve their preferred sound quality.
Color Codes for Seymour Duncan Pickups
Seymour Duncan pickups use specific color codes to identify wire functions, simplifying installation. Typically, red is the hot wire, black is ground, while white and green may indicate coil splits or additional wiring options. Understanding these codes ensures proper connections, avoiding tone loss or hum. This section deciphers Seymour Duncan’s color coding system, providing clarity for installers and helping them achieve the desired wiring configuration effectively. Proper wire identification is key to maintaining optimal tone and functionality.

Wiring Diagrams: What You Need to Know
Wiring diagrams are essential for achieving the desired tone and functionality when installing Seymour Duncan pickups. They provide a visual roadmap for connecting pickups, pots, caps, and switches. Seymour Duncan offers detailed diagrams for various configurations, ensuring compatibility with your guitar’s electronics. Whether you’re installing single-coils or humbuckers, these diagrams guide you through proper connections. Always use the correct tools, like a soldering iron and wire cutters, and double-check connections to avoid short circuits. By following these diagrams, you can unlock your guitar’s full tonal potential and avoid common wiring issues.

Types of Seymour Duncan Pickups
Seymour Duncan offers a variety of pickups, including single-coil, humbucker, and active models, each designed to deliver distinct tonal characteristics and wiring configurations for diverse guitar setups.
Single-Coil Pickups: Installation and Wiring
Installing single-coil pickups requires careful attention to wiring. Seymour Duncan’s single-coil pickups typically use a color-coded wiring system, where each wire corresponds to a specific function. The hot wire is usually connected to the guitar’s switch or selector, while the ground wire is soldered to the back of the pot or a common ground point. Proper shielding and insulation are crucial to minimize hum and ensure optimal tone. It’s important to follow the manufacturer’s wiring diagram to avoid short circuits and achieve the desired sound. Patience and precision are key for a successful installation.
Humbucker Pickups: Installation and Wiring
Humbucker pickups, like Seymour Duncan’s SH-4 JB, are installed using four-conductor wires, allowing for versatile wiring options such as coil-splitting. The hot wire is soldered to the selector switch, while the ground wire connects to a common grounding point. Proper shielding and insulation are essential to reduce hum. Series wiring delivers a fuller tone, while parallel wiring offers a brighter sound. Always consult Seymour Duncan’s wiring diagrams for specific configurations to ensure optimal performance and avoid short circuits. This guide provides step-by-step instructions for achieving professional results with your humbucker installation.
Active vs. Passive Pickups: Wiring Differences
Active pickups, like Seymour Duncan’s Blackouts, require a preamp and battery, adding a power wire to the circuit. Passive pickups rely solely on magnets and coils. Active wiring includes a battery connection, while passive setups focus on tone and volume pots. Active pickups offer higher output and clarity, reducing hum. Passive pickups provide a vintage tone with simpler wiring. Understanding these differences is crucial for achieving desired sounds. Seymour Duncan’s Active P-90 combines the best of both worlds, offering versatility. Proper installation ensures optimal performance, whether choosing active precision or passive warmth.

Common Seymour Duncan Wiring Diagrams
Seymour Duncan offers wiring diagrams for popular guitars like Stratocaster, Les Paul, and Telecaster, providing precise configurations for achieving desired tones with single-coil and humbucker pickups.
Standard Stratocaster Wiring
Standard Stratocaster wiring features a 5-way pickup selector switch, master volume, and two tone controls. The bridge, middle, and neck pickups are wired to deliver the classic Strat tones. The wiring diagram typically includes a .047µF capacitor for the tone controls and a 250k or 500k potentiometer for the volume. Proper soldering ensures the iconic Stratocaster sound, with the bridge pickup wired directly to the output jack. Following Seymour Duncan’s color codes simplifies installation, while maintaining the stock configuration preserves the guitar’s versatility and clarity. This setup is ideal for achieving the Strat’s signature clean, crisp, and dynamic tones.
Standard Les Paul Wiring
Standard Les Paul wiring includes two humbucker pickups, each with its own volume and tone control. The 3-way toggle switch selects between the bridge, neck, or both pickups combined. Seymour Duncan pickups are wired using their color-coded leads, with the hot wire connected to the switch and the ground wire to the back of the potentiometer. The tone circuits use a .047µF capacitor, and 500k pots are typically used for humbuckers. Proper shielding and soldering ensure minimal noise and optimal tone. This configuration delivers the Les Paul’s renowned warmth and sustain, making it a favorite among rock and blues players.
Telecaster Wiring Modifications
Telecaster wiring modifications can enhance versatility while maintaining its classic twang. Popular upgrades include swapping the stock pickups for Seymour Duncan models like the Vintage or Hot Tele series. Adding a 4-way switch allows for series/parallel wiring, delivering expanded tonal options. Some players prefer a tone control for the bridge pickup or a master volume for easier adjustments. Installing a capacitor or resistor can refine the tone, while shielding the cavity reduces hum. These modifications preserve the Telecaster’s iconic sound while offering modern flexibility, making it suitable for various musical genres. Proper soldering and wiring ensure reliability and optimal performance.

Advanced Wiring Modifications
Explore advanced techniques like coil splitting, phase switching, and coil tapping to unlock versatile tones. These mods enhance your guitar’s tonal range and customization options significantly.
Coil Splitting: How to Wire for Multiple Tones
Coil splitting allows humbuckers to function like single-coils, offering a brighter, snappier tone. By wiring a push-pull pot or a mini-toggle switch, you can engage the coil-splitting feature. This modification effectively switches the humbucker from series to parallel wiring, reducing output and adding clarity. Proper soldering techniques and understanding the pickup’s color codes are crucial for a successful installation. This mod is ideal for players seeking tonal versatility without altering their guitar’s aesthetic. It’s a popular choice for those who want to explore a wide range of sounds with minimal hardware changes.
Phase Switching: Adding Unique Tonal Options
Phase switching is a wiring technique that reverses the phase of one pickup relative to the other, creating a unique tonal character. When engaged, it produces a hollow, quack-like sound, often associated with Stratocaster “out-of-phase” tones. This modification involves installing a DPDT switch to toggle between standard and reversed phase wiring. The result is a wide range of tonal possibilities, from subtle shifts to dramatic changes. It’s a versatile option for players seeking to expand their guitar’s sonic palette without altering its original configuration. Proper execution requires careful wiring to ensure correct phase reversal and avoid hum or noise issues.
Coil Tapping: Expanding Your Guitar’s Versatility
Coil tapping allows players to access both full and split-coil tones from a single pickup, enhancing versatility. By installing a push-pull pot or a dedicated switch, the circuit engages a portion of the coil, reducing output and altering the tone. Tapping offers a brighter, snappier sound, ideal for rhythm and clean settings. This modification is particularly effective on humbuckers, transforming them into single-coil-like tones while retaining hum-rejection in full mode. Proper wiring ensures smooth transitions between modes, making it a valuable upgrade for those seeking tonal diversity without compromising the pickup’s original design or performance.

Troubleshooting Common Wiring Issues
Troubleshooting wiring issues involves identifying short circuits, low output, and high resistance. Use a multimeter for diagnosis and ensure proper soldering connections to resolve problems.
Identifying and Fixing Short Circuits
A short circuit occurs when wires mistakenly connect, causing silent pickups or no sound. Use a multimeter to detect unusual resistance readings. Common causes include solder bridges or misplaced wires. Inspect connections carefully, especially around the pickup selector switch and output jack. For Seymour Duncan pickups, ensure the color-coded wires are correctly routed. If a short is found, desolder the problematic area and rewire according to the diagram. Proper insulation and neat wiring practices can prevent future issues. Always double-check your work to avoid recurring faults.
Diagnosing Low Output or High Resistance
Low output or high resistance in Seymour Duncan pickups can stem from improper wiring, faulty connections, or damaged components. Use a multimeter to measure pickup resistance and voltage. Ensure all solder joints are secure and free from oxidation. Check for loose wires or incorrect connections, especially between pickups and pots. Verify that the output jack is functioning properly. If issues persist, inspect the pickups for internal damage or wiring faults. Consult the Seymour Duncan wiring diagram to confirm correct installation. Clean or replace corroded potentiometers and ensure proper grounding to restore optimal tone and functionality.
Resolving Hum or Noise Issues
Hum or noise in your guitar can often be traced to improper grounding, shielding issues, or interference from external sources. Ensure all components, including the bridge and tremolo springs, are properly grounded. Check for faulty or oxidized connections and clean or replace them as needed. Shielding the guitar cavity with conductive paint or foil can significantly reduce noise. For single-coil pickups, consider using humbuckers or active pickups to minimize hum. Seymour Duncan’s Vintage Rails offer a quiet, single-coil-sized humbucker option. Properly wiring and grounding your system, as per the Seymour Duncan wiring guide, is essential for eliminating unwanted noise and achieving a clean tone.

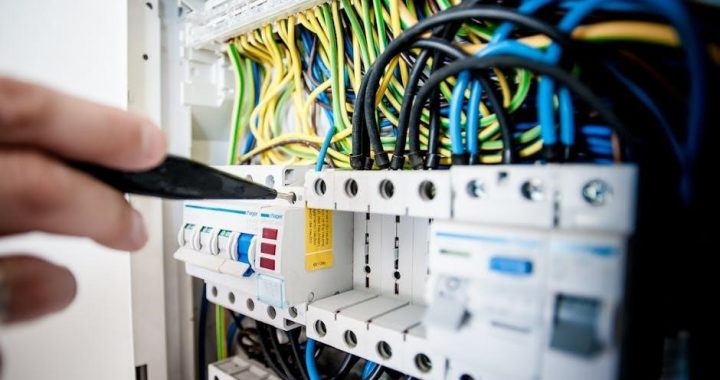
Tools and Materials Needed
Essential tools include a soldering iron, wire cutters, and a multimeter. Materials needed are pots, tone caps, and a pickup switch. Use shielding for noise reduction and a wiring diagram for accuracy;
Essential Tools for Guitar Wiring
The right tools are crucial for successful guitar wiring. A soldering iron is necessary for connecting wires and components. Wire cutters and strippers are essential for preparing wires. A multimeter helps diagnose electrical issues. Pots, caps, and a pickup switch are standard components. Shielding materials reduce hum and noise. A Seymour Duncan wiring diagram is vital for accuracy. Tweezers and small screwdrivers aid in precise adjustments. Proper tools ensure clean, reliable connections and professional results. Always use high-quality solder and follow safety precautions when soldering. These tools will help you achieve the desired tone and functionality from your Seymour Duncan pickups.

Recommended Materials for a Successful Install
High-quality materials are key to a professional installation. Use insulated wire (22-24 AWG) for connections. Capacitors (0.047 µF or 0.1 µF) are essential for tone shaping. A resistor (1 kΩ) may be needed for volume pots. Solder (60/40 tin-lead) ensures reliable joints. Shielding materials reduce hum and noise. Always reference the Seymour Duncan wiring diagram for your specific setup. Pickups like the Duckbuckers or Vintage Rails require precise wiring. Follow the manufacturer’s instructions and double-check connections to avoid errors. Proper materials ensure a clean, professional install and optimal tone from your Seymour Duncan pickups.

Advanced Techniques
Discover active wiring with preamps, custom tone paths, and unique modifications to easily maximize versatility and unlock your guitar’s full sonic potential with Seymour Duncan.
Active Wiring: Adding Preamps or Active Circuits
Active wiring involves integrating preamps or active circuits to enhance tonal clarity and versatility. Seymour Duncan active pickups, like the Blackouts, use built-in preamps to boost signal strength and reduce hum. This setup allows for consistent tone across all volumes and playing styles. When installing active wiring, ensure proper grounding and follow Seymour Duncan’s diagrams to avoid short circuits. Active circuits can also include tone-shaping options like active EQ or boost switches. For optimal results, use high-quality components and shielded cables to minimize noise interference. Always test your setup before finalizing to ensure smooth operation and desired tonal outcomes.
Custom Wiring: Creating Unique Tone Paths
Custom wiring unlocks personalized tonal possibilities by reconfiguring pickup connections and control layouts. By experimenting with coil-splitting, phase switching, or custom capacitor values, players can craft unique sounds tailored to their style. Seymour Duncan pickups, with their versatile designs, are ideal for such modifications. Consider blending single-coil clarity with humbucker warmth or designing intricate switching systems for expanded tonal options. Always refer to wiring diagrams and use high-quality materials to ensure reliability. Custom wiring demands patience and precision but offers immense rewards in achieving a distinctive, signature tone that stands out from standard configurations.
Mastering Seymour Duncan wiring techniques unlocks a world of tonal possibilities. With patience and practice, you can achieve the perfect sound tailored to your playing style.
Refer to official guides, and explore resources for continuous learning to refine your skills and stay updated on the latest wiring innovations and modifications.
Final Tips for Successful Seymour Duncan Wiring
Always refer to Seymour Duncan’s official wiring diagrams for accuracy. Use high-quality tools and materials to ensure reliable connections. Start with basic setups before exploring advanced modifications. Double-check your work to avoid short circuits or low output issues. Experiment with coil splitting or phase switching to expand tonal versatility. Practice patience and take your time during installation. For troubleshooting, consult Seymour Duncan’s resources or seek professional advice. Keep your guitar’s electronics clean and well-maintained for optimal performance. Remember, proper wiring is key to unlocking your guitar’s full tonal potential.
Resources for Further Learning
For deeper understanding, explore Seymour Duncan’s official website, which offers detailed wiring diagrams and installation guides. Online forums and communities, like guitar repair groups, provide valuable insights and troubleshooting tips. YouTube tutorials and instructional videos demonstrate hands-on techniques. Books on guitar electronics, such as The Guitar Handbook, complement this guide. Additionally, manufacturer-specific resources, like Seymour Duncan’s color code charts, ensure accurate wiring. Utilize these tools to refine your skills and explore advanced modifications, enhancing your guitar’s tone and versatility through informed and precise wiring practices.